MediPOS journey
Run a pharmacy day from open to close
This guide walks you through MediPOS the way a real pharmacy uses it — not as a feature catalog, but as one continuous journey from morning overview to evening day book.
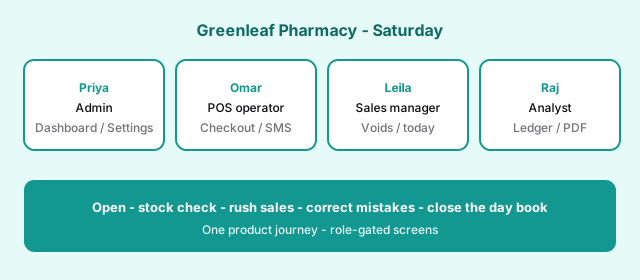
Meet the team
Priya (Admin) — Opens on Dashboard, fixes stock after delivery, configures branding and users.
Omar (POS operator) — Rings sales all day; attaches customers with F9; prints or sends digital invoices.
Leila (Sales manager) — Voids incorrect bills with a reason; checks today/yesterday totals.
Raj (Analyst) — Runs the day ledger, charts, and PDF export at close.
What MediPOS is (and isn’t)
MediPOS is pharmacy retail POS: catalog & stock, checkout, customers, bills, daily reporting, and tenant admin. It is not a prescriptions, insurance claims, or purchasing system.
Stage 1 · Entry
Sign in, land, and learn the map
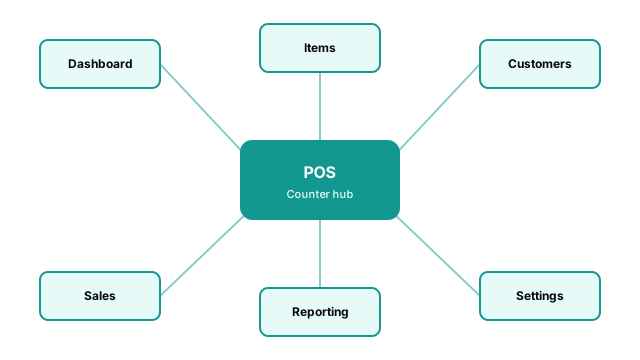
Metaphor: MediPOS is the pharmacy’s front desk and back office in one building. Sign-in is the door; the sidebar is the hallway to every room you’re allowed to enter.
Why this stage exists
Access is role-based. After login you land on the first page your role can open — not always Dashboard. That keeps cashiers on POS and analysts on reporting without noise.
How to use it
What comes next
Priya checks the Dashboard before the shop gets busy — the morning briefing room.
Stage 2 · Overview
Dashboard — the morning briefing
Why it exists: one glance at today’s health — sales, customers, and stock risk — before you touch the counter.
What this section is for
- Today’s and this month’s sales with change vs prior period and bill counts
- Total registered customers
- Low-stock item count and list
- 14-day sales trend, top sellers this month, recent sales
What comes next
Fix stock in Items so POS never oversells tracked products.
Stage 3 · Catalog
Items — the medicine cabinet ledger
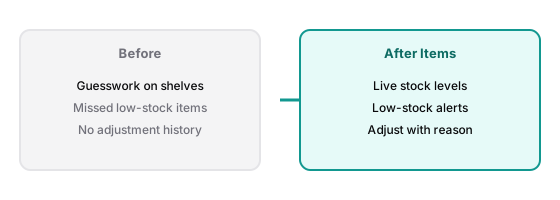
Metaphor: every Drug, Syrup, Service, and Other product has a labeled shelf slot. Adjustments are written in the ledger with a reason — never silent.
What you can do
- Browse and search by name, generic name, or barcode
- Filter by type and low stock; paginate the list
- Add / edit / delete items (name, generic, type, price, stock, unit, barcode)
- Adjust stock with +/- delta, required reason, optional note (tracked items)
- See states: in stock, low, out, not tracked (services), untracked products
What comes next
Ensure regulars exist in Customers so Omar can attach them at checkout.
Stage 4 · People
Customers — the neighborhood book
Why it exists: attach a person to a sale so you get purchase history, lifetime stats, and digital invoice SMS when a phone is on file.
What this section is for
- Directory with visits, total spent, last visit
- Search by name or phone; add / edit / delete
- Profile with lifetime stats and filtered purchase history
- Jump from a past purchase into Sales bill detail
What comes next
The counter opens — POS is where value is captured.
Stage 5 · Counter
POS — the checkout loop
Metaphor: a continuous loop — search → cart → customer → pay → receipt → next sale. Speed matters; shortcuts exist for a reason.

What this section is for
- Search/browse items (name, generic, barcode); quick-create if permitted
- Build cart; type digits before selecting an item for quantity
- Attach / quick-create / quick-edit customer (F9)
- Discount and tax %; optional line price override (permissioned)
- Cash (tendered + change) or Card; complete sale (bill #, stock decrement)
- Print thermal receipt and/or send digital invoice SMS
What comes next
When a bill needs correction, Sales is the exception path — not another silent rewrite.
Stage 6 · Bills
Sales — the receipt drawer
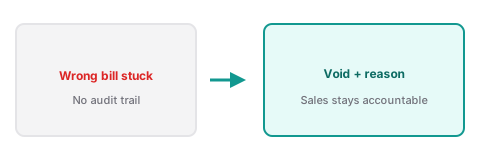
Why it exists: find any bill, understand what was sold, void mistakes with a reason, and reprint. Customers can also open a public digital receipt link.
What this section is for
- List bills: number, date, customer, items, payment, total, void status
- Filter by search, customer, payment method, date range
- Bulk void with required reason (if permitted)
- Bill detail: lines, discount, tax, tendered, change; print; single void
- Public customer-view receipt (no login; requires tenant query param)
What comes next
At close, Reporting turns the day’s bills into the official day book.
Stage 7 · Day book
Reporting — close the day book
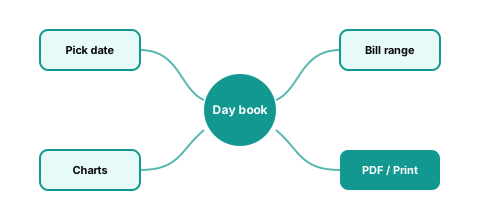
Metaphor: a control loop — pick the day, choose the bill range, read the summary, export proof. Happy path is a full-day PDF; exception is a partial range for a shift handover.
What this section is for
- Daily ledger for a calendar day; day-step strip
- Inclusive bill-range slider for partial-day reporting
- Summary: revenue, bill count, items sold, average ticket, voids
- Hourly chart, best sellers, cash vs card mix (Admin/Analyst)
- Export PDF day ledger; print thermal day report
- Sales manager: today and yesterday only, no charts
What comes next
Settings keeps the shop branded, locked overnight, and staffed with the right roles.
Stage 8 · Admin
Settings — the back office
Why it exists: make MediPOS look like your pharmacy, print the way your counter works, lock the terminal overnight, and give each person only the rooms they need.
Tabs you’ll use
- Appearance — Light / Dark / System; UI corner roundness
- Branding — Logo upload; primary/secondary colors; currency symbol
- Contact & hours — Maps link, email, open/close times
- Pharmacy profile — Legal name, address, phone, receipt footer
- Invoice — Digital / Paper / Both; thermal 58/80mm; QZ Tray
- Security — 6-digit workspace lock PIN; pages allowed while locked
- Users — Create users, assign roles (Admin, POS operator, Sales manager, Analyst, Operations team)
What comes next
Run the end-to-end checklist once — then every Saturday feels familiar.
Wrap-up
Full Saturday checklist
Use this as Greenleaf’s open-to-close runbook. Check items off — they save with your guide progress.

Wrap-up
Frequently asked questions
Short answers grounded in how MediPOS actually works.
Can staff sign up themselves?
Not inside the app. Admins create users under Settings → Users. Use the marketing Sign up link to start provisioning with codeclutch.
Does MediPOS handle prescriptions?
No. It focuses on retail POS: catalog, stock, checkout, customers, bills, reporting, and admin.
Why don’t I see all sidebar pages?
Navigation and actions are role-gated. Ask an Admin to adjust your roles if you need more access.
What is workspace lock?
A 6-digit PIN that restricts the terminal to pages you allow (often POS only) — useful overnight or during breaks.
Cash vs card — where do I see the mix?
Reporting shows payment mix charts for Admin/Analyst roles on the selected day/range.
How do digital invoices reach customers?
Attach a customer with a phone at POS (or beforehand). After sale, send digital invoice SMS when permitted; Settings chooses Digital / Paper / Both as the default.
Sales manager can’t open last week’s report?
That role is limited to today and yesterday, without charts. Use Analyst or Admin for full history and analytics.